Scanning Applications in an IP Range
If you want to scan a number of web applications running on a range of IP addresses, you can use a PowerShell script.
The script does three things:
- Using Nmap, it scans the configured range of IP addresses for open HTTP(s) services,
- Combines the protocol, the domain name, and the port number to identify a URL,
- Starts scanning every identified URL.
There are four parts to this process:
- Download the PowerShell script
- Download a network scanner
- Configure the options in the PowerShell script
- Execute the PowerShell script to start the scanning process
How to download the PowerShell Script
Download the PowerShell script from the link.
How to download a network scanner
The script uses Nmap, a free network scanner. Therefore, before running the script, download Nmap from Microsoft Windows Binaries.
How to configure the options in the script
Using a text editor, edit the script as described in the table.
This table lists and explains the options that must be configured before executing the script.
| Options | How to configure them |
| ipRange | The range of IP addresses that you want to scan. Refer to the Nmap Target Specification help page for more information on how to specify a range of IP addresses. (Example: “192.168.234.128-135”) |
| ports | The ports to scan. Unless you have web applications running on non-default ports, the default ports are 80 for HTTP and 443 for HTTPS. You can enter a list of ports and separate them with a comma, or a range and use the dash (-) character. Refer to the Nmap Port Specification help page for more information and options. |
| nmapExe | The path to nmap.exe. The default path is C:\Program Files (x86)\Nmap\nmap.exe |
| netsparkerExe | The path to Netsparker.exe. The default path is C:\Program Files (x86)\Netsparker\Netsparker.exe |
| reportTemplateName | The name of the Invicti report template to use for generating reports, by default the Detailed Scan Report template will be used. For further information, see Detailed Scan Report. |
| reportsFolder | The folder where the report is saved. The folder must exist for the scanner to save the reports, and the default folder is C:\reports. |
How to execute the script to start the scanning process
- Once you configure the script, open the command prompt window and run cmd.exe.
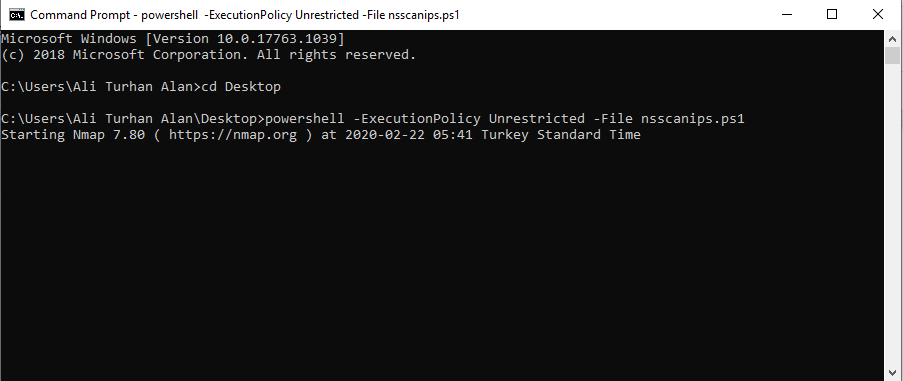
- Navigate to where the script is stored and enter the following command as illustrated in the screenshot:
powershell -ExecutionPolicy Unrestricted -File nsscanips.ps1
If you use the PowerShell command line window, simply use this command:
.\nsscanips.ps1