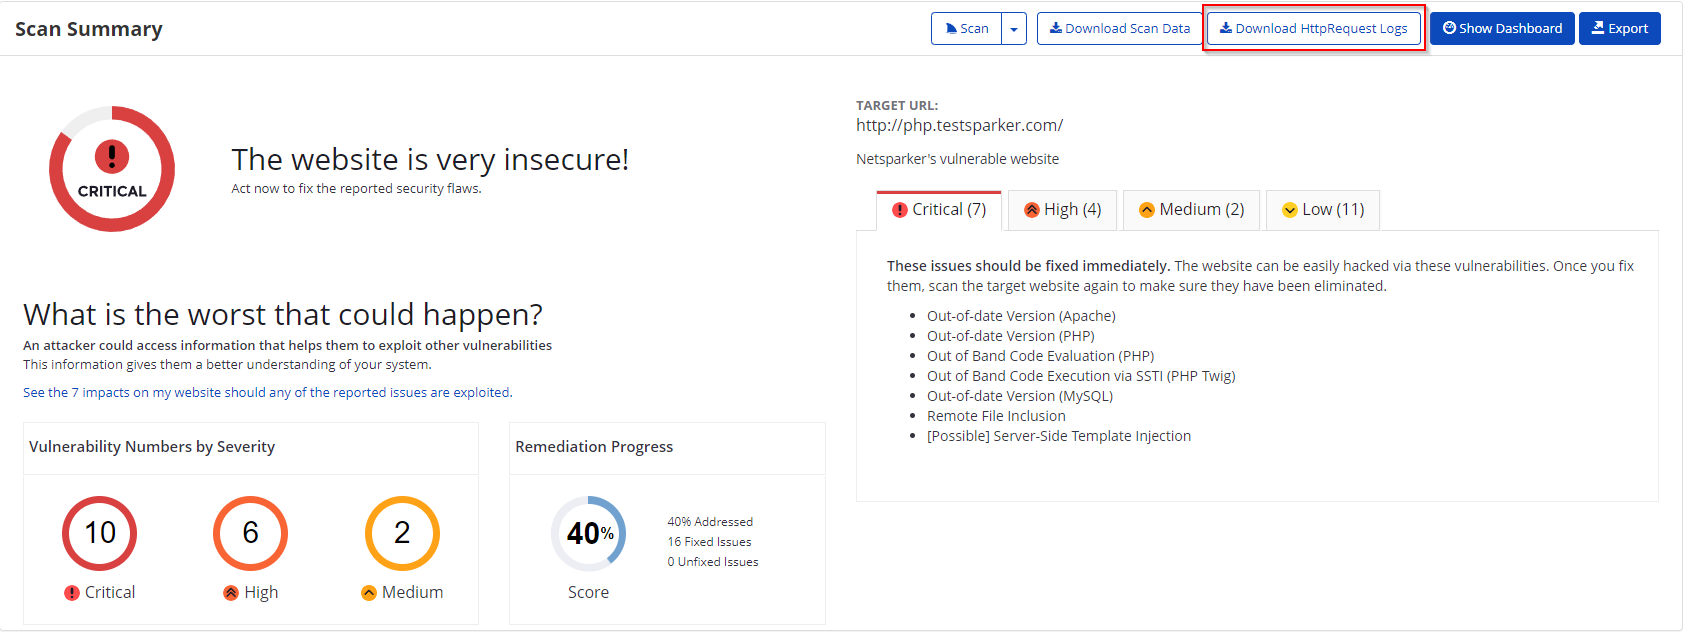
Pre-Request Scripts
Pre-Request Scripts allow you to manipulate requests easily before sending them to the target. This feature also helps the scanner achieve better scan coverage and provide better results.
You may need to manipulate a request by adding, changing, or computing some part of it before it is sent. Here are some typical scenarios:
- To calculate Hash-based Message Authentication Code (HMAC) value
- Meet double submitted cookie requirements for anti-Cross-Site Request Forgery (CSRF) mechanisms
- To send random values
- To abort a request for some situation
You can write your script in the Pre-Request Scripts tab. Alternatively, you can write it in any text editor and copy it in.
Pre-Request Script Fields
This table lists and describes the fields in the Pre-Request Scripts.
| Field | Description |
| Enabled | Select to enable Pre-Request Script. Once enabled, the Presets dropdown is activated. |
| Presets | This allows you to select the HMAC option and view the relevant script. |
| Test Script | This allows you to test the new script. |
Writing a Pre-Request Script
Invicti can manipulate a request since it runs Pre-Request Scripts automatically before dispatching a request.
How to Write a Pre-Request Script in Invicti Enterprise On-Premises
- Log in to Invicti Enterprise.
- From the main menu, click Scans, then New Scan. The New Scan window is displayed.
- From the Scan Options section, select Pre-Request Script. The Pre-Request Script section is displayed.
- Select the Enabled checkbox.
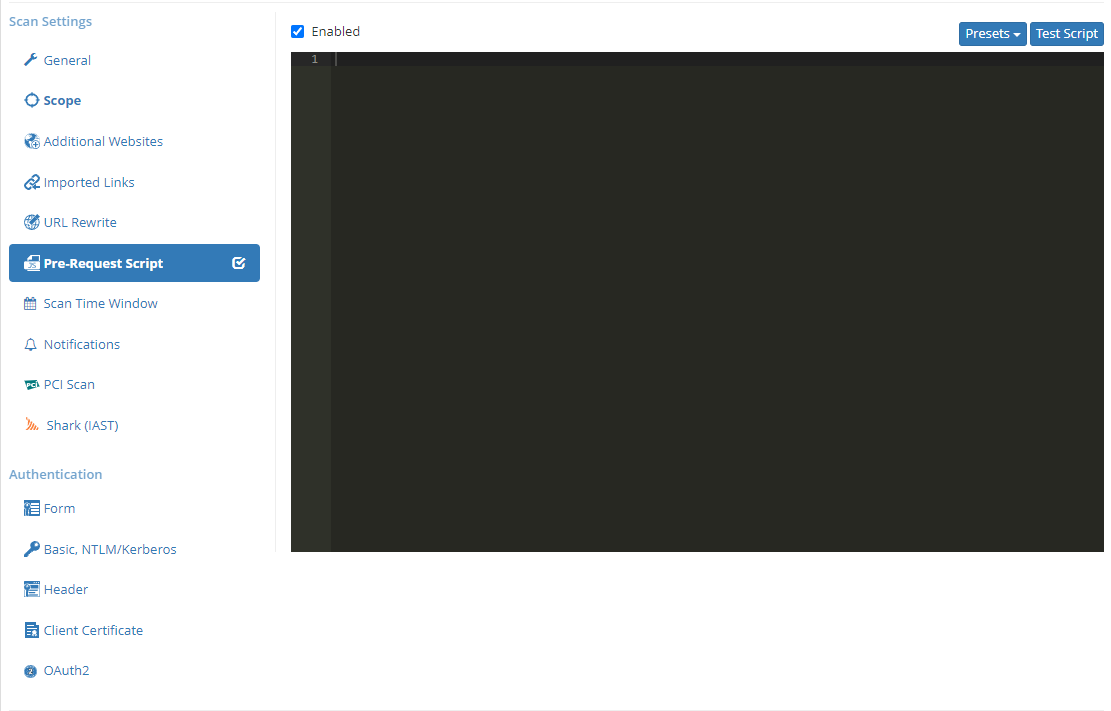
- You can now start to write your script using JavaScript.
How to Write a Pre-Request Script in Invicti Standard
- Open Invicti Standard.
- In the Home tab, click New. The Start a New Website or Web Service Scan window is displayed.
- Click the Pre-Request Scripts tab. The Pre-Request Script panel is displayed.
- Select the Enabled checkbox.

- You can now start to write your script using JavaScript.
Testing Pre-Request Scripts
Invicti can check the script syntactically to make sure that it does not contain any errors. When the scanner verifies that the script contains no errors, you can begin scanning.
How to Test a Pre-Request Script
- Write your script as explained in Writing a Pre-Request Script copy it in from
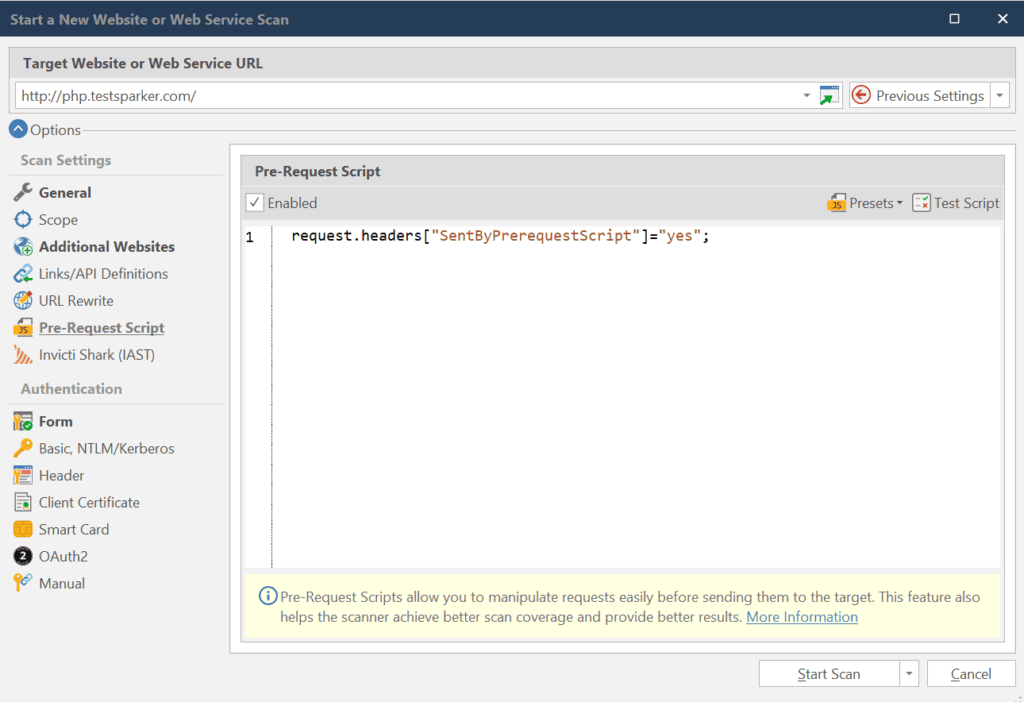
- Click Test Script.
- If Invicti finds no error in your script, a confirmation dialog is displayed.

- Click Start Scan.
- Once the scan has started, you can view the effect of the Pre-Request Scripts in the request sent by Invicti.

Scanning with pre-request scripts in Invicti Enterprise On-Demand
To use a pre-request script in Invicti Enterprise On-Demand you need to submit a ticket through our Help Center. Only a support engineer can add a pre-request script in your account.
- Once activated, write your own pre-request script. (For further information about writing a script, see Writing Pre-Request Scripts.) Then, create a scan profile configured for the pre-request script in Invicti Enterprise On-Demand.
- Share your script with the Support engineers. They will add the script to the customized scan profile and update it.
How to Scan with a Pre-Request Script in Invicti Enterprise On-Demand
- Log in to Invicti Enterprise.
- From the main menu, select Scans > New Scan.
- In the Target URL field, enter the URL.
- From the Scan Profile drop-down, select the customized scan profile.
- From the Scan Settings section, select Pre-Request Script. Then, select the Enabled checkbox.
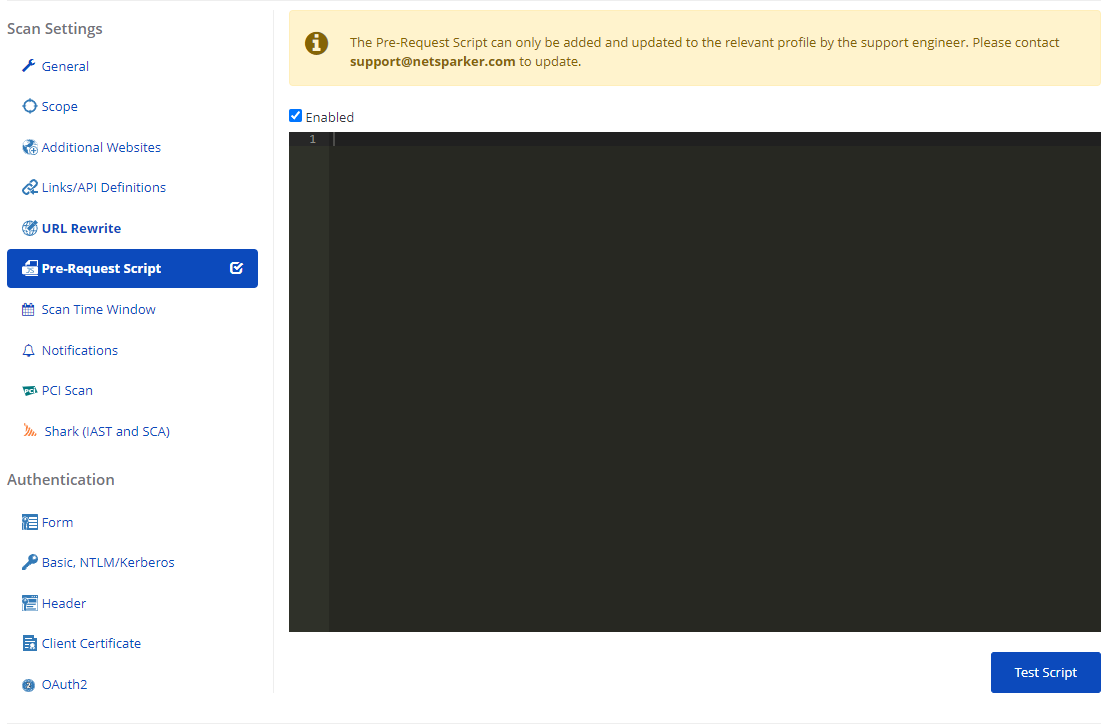
- Select Launch.
Saving Pre-Request Scripts into the Invicti Directory
In addition to the Pre-request Script panel, you can also write a pre-request script using any editor of your preference. You can either create a scripting file in the Pre-Request directory (\Documents\Invicti\Scripts\PreRequest) or move your script to that directory after completing the coding.
There are, however, some limitations if you prefer to store your scripts directly in the directory. For instance, you cannot reach context variables from that script. Regardless, it is a good place to store the flow of your script, such as helper functions, instead of adding multiple lines of code in the Pre-request Scripts panel.
Sample HMAC Code
Invicti can use a simple pre-request script such as the one below to compose the HMAC header. The scanner will add this header to all request headers.

You can write and save this script in an external file so that you can have a clearer Pre-request Scripts panel in Invicti. Except for line 37, all this could be stored in a script file.
invicti.setEnvironmentVariable('hmacAuthHeader', getAuthHeader(request['method'], request['uri'], request['data']));
Writing Pre-Request Scripts
To write a pre-request script, you need to specify the environment variables; facets, objects and helpers; and the flow of the script (examples provided below). Even though the main goal remains the same, the implementation can vary according to your needs.
Let’s examine the building blocks in turn.
Environment Variables
In any programming language, variables are very important for storing values and retrieving them later. You can use variables to change some part of a request dynamically. Invicti’s Pre-Request Scripts enable you to update placeholders at any place in a request.
Here is an example of a request you might import into Invicti:
GET /user/1 HTTP/1.1
Host: {{environment}}.example.com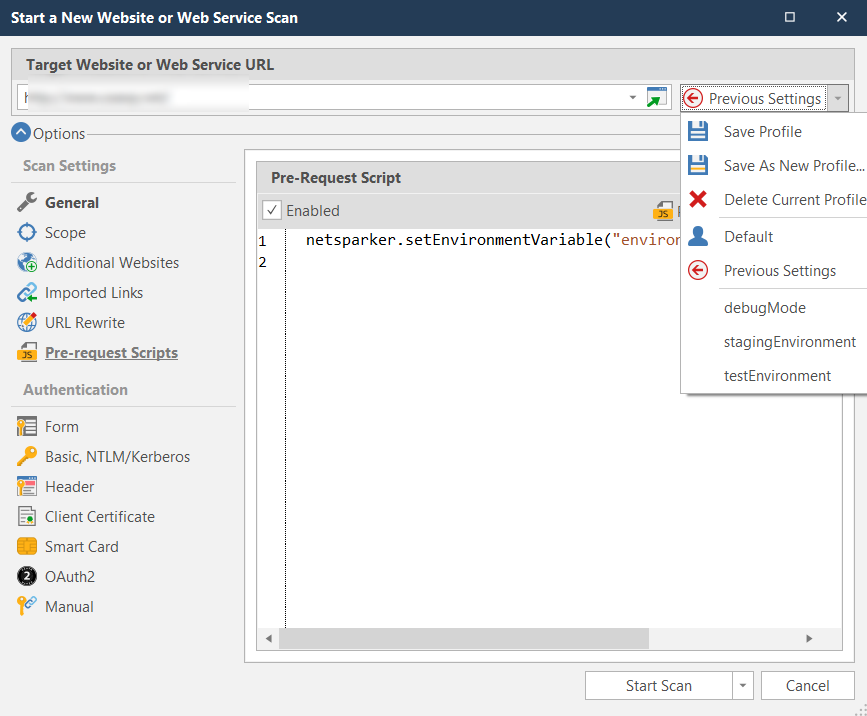
Here is another example of a request:
http://api.example.com/{{apiVersion}}/users/list
invicti.setEnvironmentVariable("apiVersion","v1");The Building Blocks of Pre-Request Scripts: Facets, Objects and Helpers
Facets, objects and helpers are among the ingredients of the Pre-Request Scripts feature that you can use when writing scripts.
You can use the request object to access the current request Invicti is about to send. This object also allows you to modify the HTTP request.
This table lists and explains the method.
| Method | Explanation |
| request.method | This returns the method (verb) of the HTTP request to which the Pre-Request Scripts will be applied.
If you need to know which HTTP verb (method) is used before manipulating a request, request.method can help you find out. Sample Scenario Because only POST and PUT requests can have a request body, if your pre-request script requires some changes in the request body, you have to first check whether the request method is one of those verbs. Otherwise, the request would not have a request body: if(request.method == “POST”) request.body = request.body + “&debug=true”; |
| request.body | The access to a request body is usually a vital part of the pre-request script. The request object has a method body that can be used as both a getter and a setter. |
| request.uri | To get the URL of the request that Invicti is about to send, a request.uri method can be used. |
| request.headers | This collection can be used for both the getter and the setter. It is possible to retrieve the value of a specific request header or set request’s header with a new value. You can set a custom header using this collection.
Here is an example. Let’s say the target application requires you to send an x-auth header with a legitimate value. request.headers[“x-auth”] = calculateXAuth(); |
| invicti
|
The object invicti offers some properties and methods that can be useful while writing a pre-request script.
The most important one amongst them is the requestmethod. It helps to initiate HTTP requests in a pre-request script. As shown, it is very useful when request chaining is a need. var request = new Request(‘http://example.com/action‘); request.parameters.add(new Parameter(‘foo’, ‘bar’, 1)); var res = invicti.request(request); |
| CryptoJS
|
Invicti’s Pre-Request Script feature can use the CryptoJS library. CryptoJS is a growing collection of standard and secure cryptographic algorithms implemented in JavaScript using best practices and patterns.
Here is an example: // Hashing response body with SHA512 requestBody = request.body; CryptoJS.SHA512(requestBody); |
Manipulating Request Parameters
For adding parameters into anywhere in a request, you can use the request.parameters collection.
Here is an example for adding a parameters such as following:
request.parameters.add(parameter);It takes only one class Parameteras parameter. Here is an example of an instance of the Parameter class:
var parameter = new Parameter(paramaterName, parameterValue, parameterType);This table lists and explains some of the most common values of the parameter type.
| Parameter | Value | Example |
| Querystring | 0 | example.com/?param=value |
| POST | 1 | Sent in request body |
The purpose of the parameter name and parameter value are obvious. The enumeration type parameterType requires some clarification:
0 : Querystring
The value ‘0’ means Querystring. With this type of parameter, you can add a query string parameter to the request being sent:
var parameter = new Parameter(paramaterName, parameterValue, parameterType);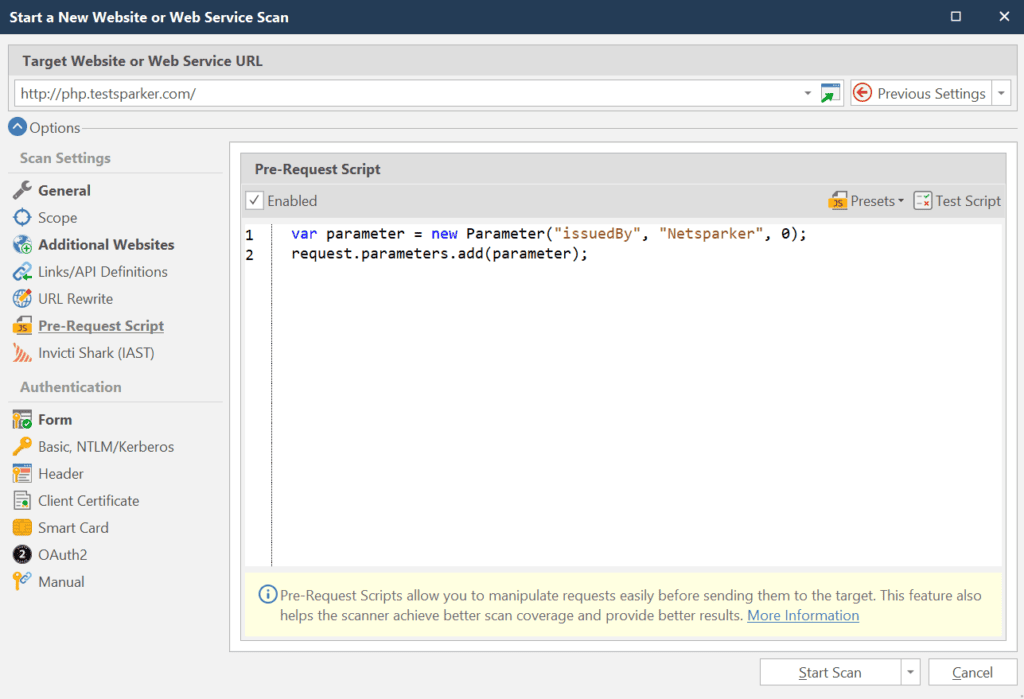
You can view the effect of the Pre-Request Scripts in the request Invicti sends.

For further information on parameter type, click the Custom Scripting API icon in the Help menu in Invicti Standard.
Use Cases and Presets
Here are some examples that address common scenarios for those who want to scan web applications with Invicti.
Real Time Computed Parameters – HMAC Tokens
In this example, in order to get hmacToken value, you can sign a string containing your token and timestamp value with your secret key.
var token = "TOKEN"
var secret = "MyTopSecret"
function signToken() {
    var dateTime = (new Date).getTime().toString()<
    var stringToSign = `${token}-${dateTime}`;
    const hash = CryptoJS.HmacSHA512(stringToSign, secret)
    return CryptoJS.enc.Base64.stringify(hash);
}
var signedToken = signToken()
invicti.setEnvironmentVariable("hmacAuthHeader", signedToken);
Now, you have to define the point in the request that the hmacAuthHeader value will be populated. There are several ways to do this. Here, we illustrate how to do it using the Headers settings in the Scan Policy.

Here is the request in which the hmacAuth value was populated.

For further information, see HMAC Authentication via Scripting in Invicti Standard.
Chained Requests
You can chain requests using Invicti’s Pre-Request Scripting feature. First, you may be required to make a prior request in order to get a token for subsequent requests.
For example, the following script makes a request to get a JWT token for subsequent ones.
function getToken(invicti){
        var request = new Request('http://login.example.com');
        request.parameters.add(new Parameter('username', 'admin', 1));
        request.parameters.add(new Parameter('password', '4Really53cur3P455w0rd', 1));
        var res = invicti.request(request);
        return res.body;
}
    netsparker.setVariable("JWT", getToken(invicti));
Then from the Header tab of the Authentication section of the Scan Settings in the Start a New Website or Web Service Scan dialog, you can set Authorization header.

Double Submitted Cookies
You may want to use CSRF prevention mechanisms without depending on a persistent method. Modern web applications are mostly distributed nowadays. So you may not prefer to use old-school methods like storing CSRF tokens in session objects.
Some websites prefer sending CSRF tokens with a cookie like this:
HTTP/1.1 200 OK
Set-cookie: XSRF-Token=somerandomvalue
…
Then, it expects to see that the XSRF-Token cookie value and custom header X-CSRF-Token value are equal.
GET / HTTP/1.1
Cookie: XSRF-Token=somerandomvalue
X-CSRF-TOKEN: somerandomvalue
There are two limitations here that prevent attackers from being able to exploit potential CSRF issues:
- Because of the Same Origin Policy, when a request is made to a cross-domain, a website (attacker’s own site or attacker controlled website) cannot set a custom header.
- Even if attackers are able to add a custom header into a request (for example, CORS Preflight Request, as explained in Same Origin Policy), it’s not possible to get the value of the CSRF cookie.
Here is an example of the code that could be used.
if ($_COOKIE["XSRF-Token"] == $_SERVER['HTTP_X_CSRF_TOKEN'])) {
         Do something
} else {
                throw("CSRF protection enabled.")
}
You do not need to store anything on the server-side to make this CSRF prevention mechanism work.
You can use a Pre-Request Script such as the following for double submitted cookie cases.
if(request.headers.Cookie) {
var cookiePattern =  /XSRF-Token=([^;]+)/gm;
var match = cookiePattern.exec(request.headers.Cookie);
             if (match && match[1]){
           // 4 is request header parameter.
                  request.Parameters.Add(new Parameter('X-CSRF-TOKEN', match[1], 4));
        }
}

Abort requests
Pre-Request Scripting allows you to abort some requests before arriving at the target.
For example, if a request parameter (action) has a delete value you have to stop the request before sending it to the target.
if(request.parameters["action"] == "delete") {
  request.Abort();
}
Debugging Pre-Request Scripts Using Helper Functions
The Pre-Request Scripts panel only allows you to check the code’s syntax. If you need further assistance, Invicti offers some helper functions that you can use while writing your scripts.
logUI
This function allows you to print out messages to log panels in the UI. It helps you to debug your code if you lack experience.

This is what the Logs panel looks like.

For further information, see Logs.
logInfo, logWarn, logError
Instead of printing out messages to the UI Logs panel directly, you can write them into Invicti’s log file with different levels (Activity Tracking, Verbose, Information, Warning, Error, and Critical).
Note that writing to a log file depends on the Logging Levels you selected. For example, if you select the Critical level, only Critical level messages will be shown in the log file (not Warning or Error level ones). You can change the Logging Levels setting in the Logging tab in the Options dialog.
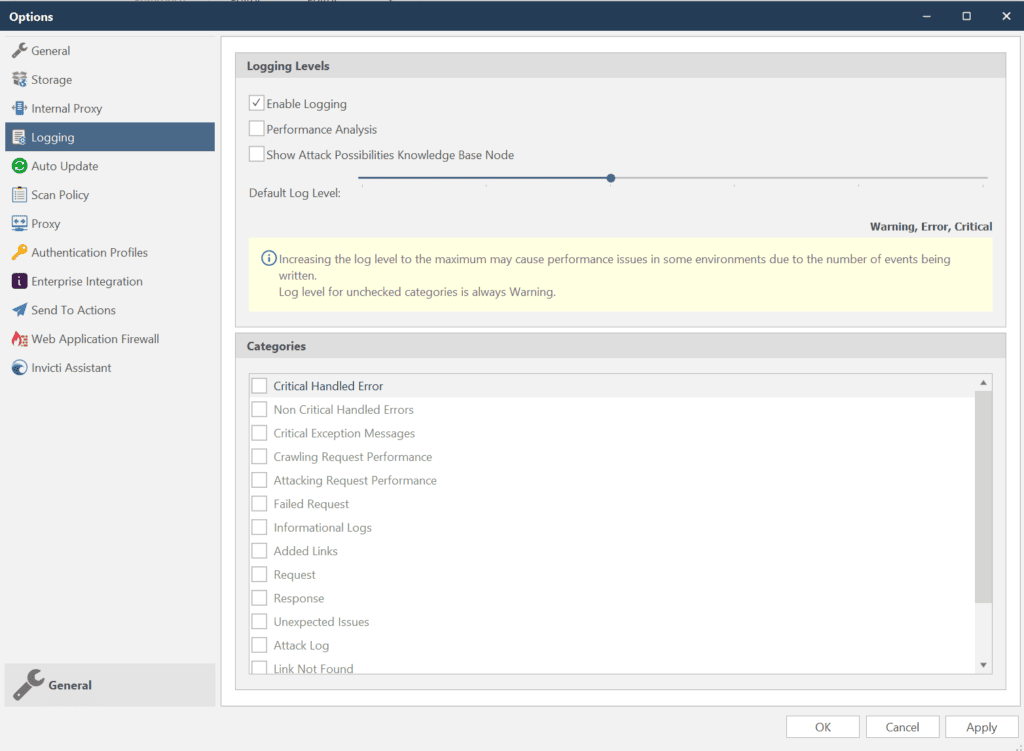
At the default level, information level logging messages will not be shown in the nstrace file. Nevertheless, the logUI function can directly write to the log panel in the UI. It does not depend on the Logging Levels setting.
You can view the log files produced by Invicti from the scan directory located at C:\Users\USER\Documents\Invicti\Scans\.
For further information, see Logging.
Verifying Pre-Request Scripts
Invicti can check the script syntactically to make sure that it does not contain any errors. To see whether the pre-script actually worked in your scan, you need to manually verify it.
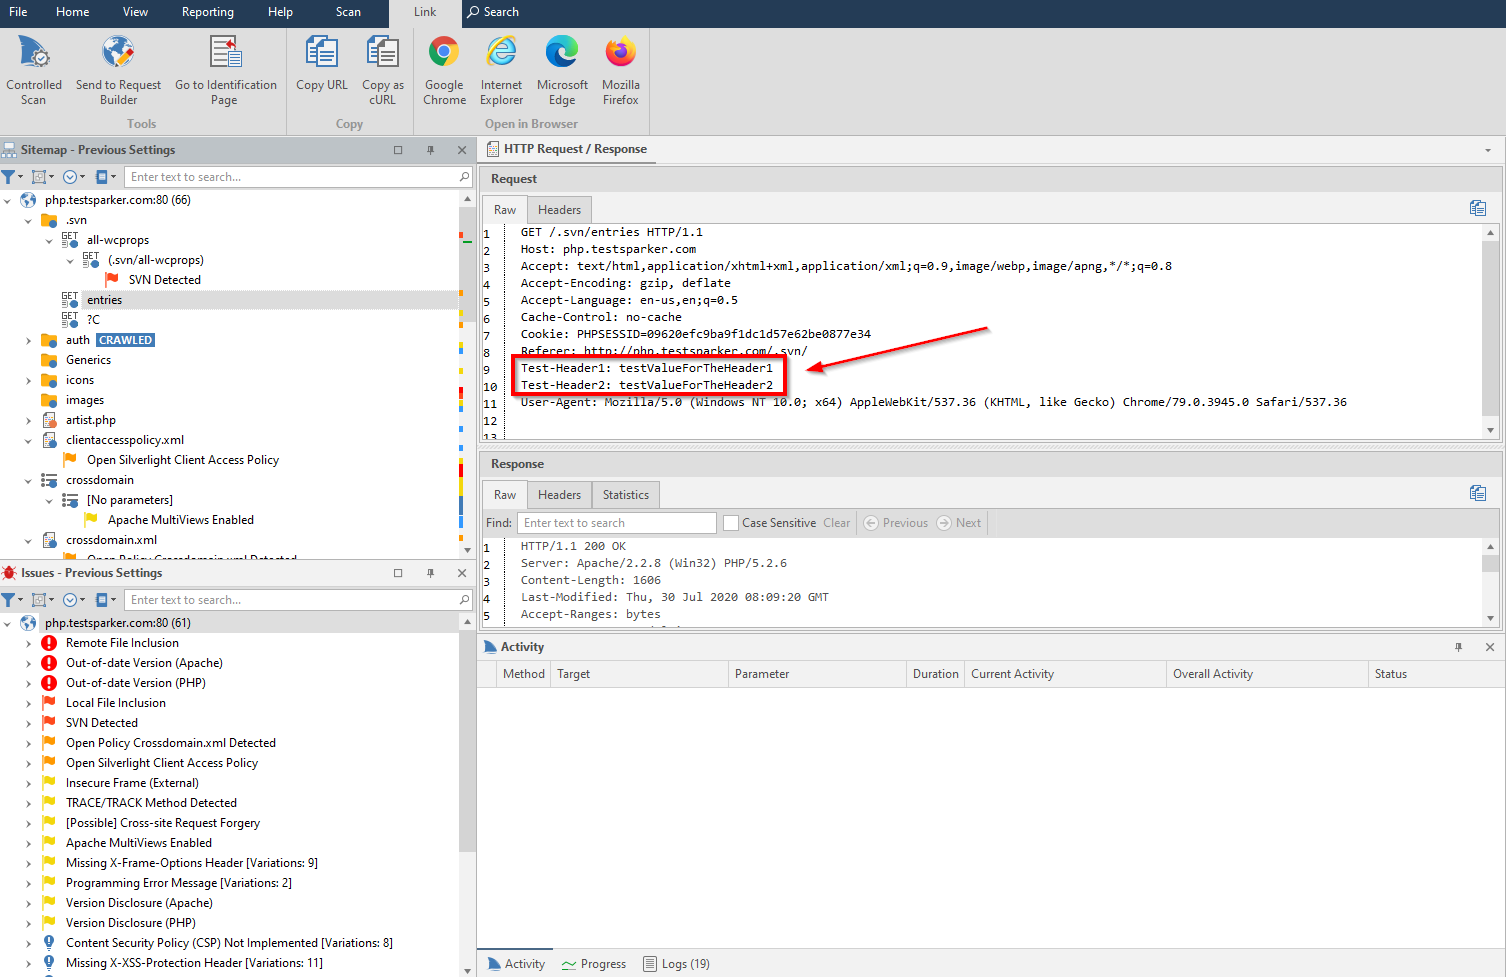
In order to show how you can verify it, we added, for this example, two headers to the Invicti’s request:
request.Headers["Test-Header1"] = "testValueForTheHeader1";
request.Headers["Test-Header2"] = "testValueForTheHeader2";
How to verify requests and responses in Invicti Enterprise
- From the main menu, select Scans > Recent Scans.
- Next to the relevant scan, select Report.
- Scroll down to the Technical Report section and select the Issues tab.
- From the Scan Summary section, select one of the issues you want to check.
- Select the Request/Response tab to verify whether your script is added to the request.
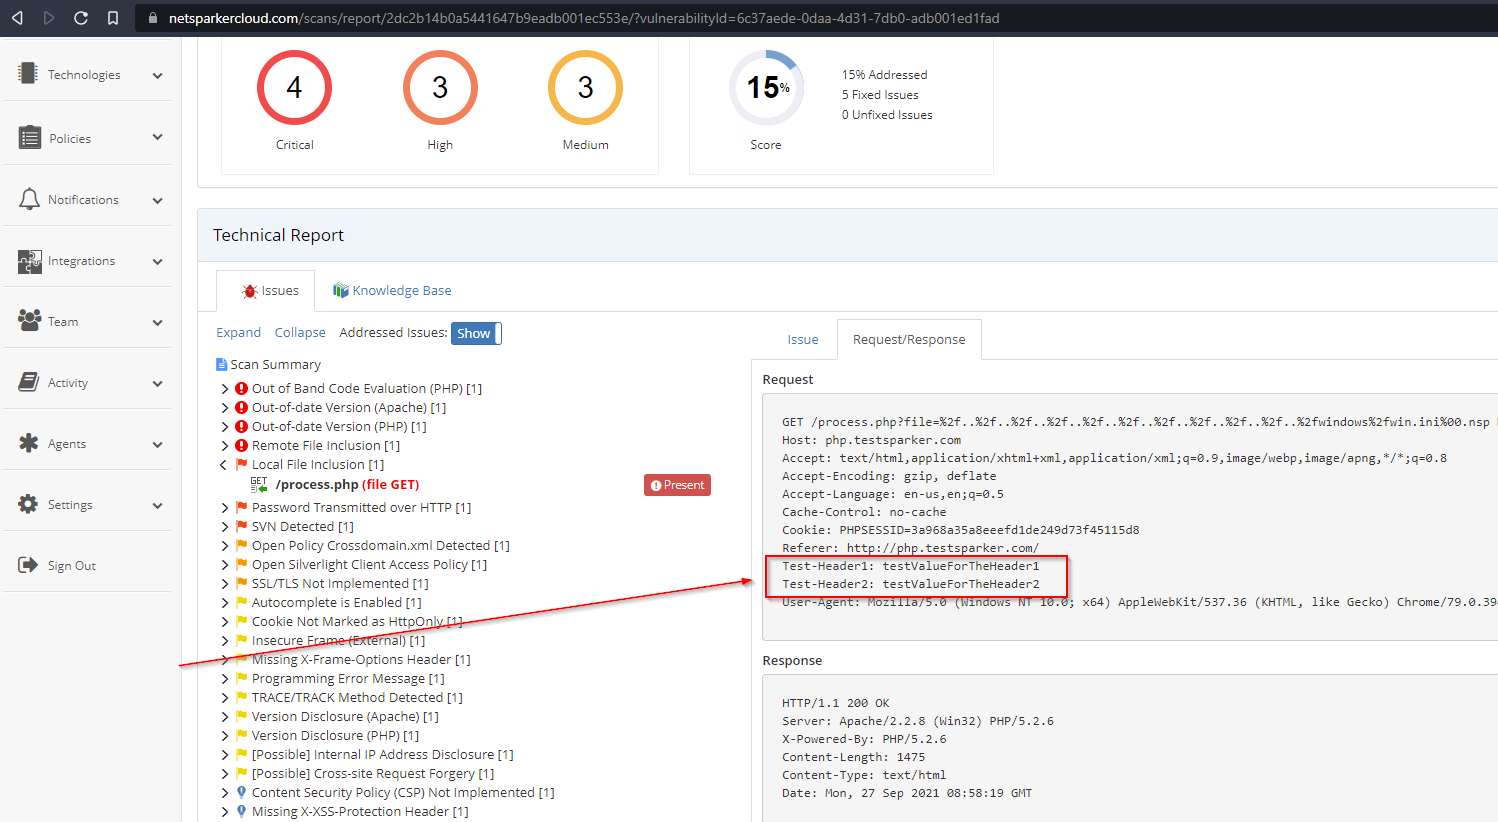
How to verify requests and responses in Invicti Standard
- Open Invicti Standard
- From the ribbon, select the File tab. Local Scans are displayed. Double-click the relevant scan to display its results.
- From the Sitemap panel, select one of the issues you want to control.
- Select HTTP Request/Response > Raw to check whether your script is added to the request.
You can also verify HTTP requests and responses with Fiddler. There are two methods to check these requests and responses to see whether the Pre-Request Script worked or not.
How to verify requests and responses by using Fiddler
- Download and install Fiddler.
- Start Fiddler and make sure that it captures the traffic.
- Launch scan with Invicti Standard.
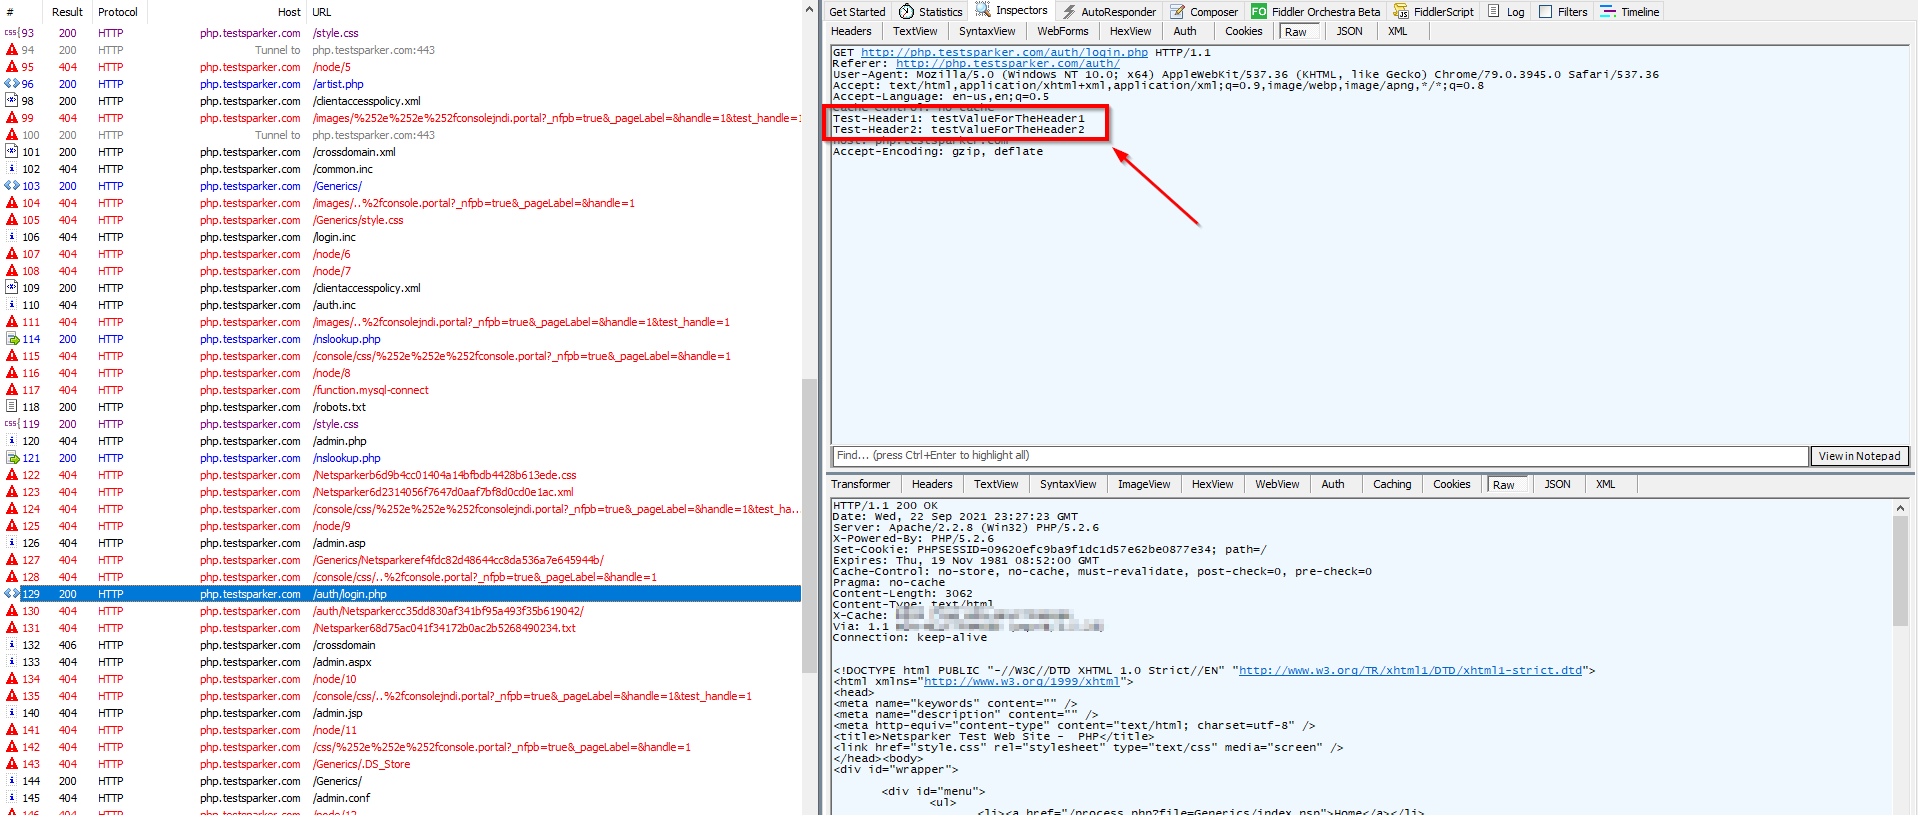
- Select a request in the Sessions List.
- From the Inspectors tab, select Raw to see the details.
Alternatively, you can download the HTTP Request Logs in Invicti Enterprise and check the details to see whether the Pre-Request script worked or not.
- To do this, first, from the main menu, select Policies > Scan Policies. From the Scan Policies page, next to the relevant scan policy, select Edit. Then, scroll down to the Request tab. Select Capture HTTP Requests.
- After running a scan by using this scan policy, from the main menu, select Scans > Recent Scans. Next to the relevant scan, select Report. On the Scan Summary page, select Download HTTP Request Logs at the top. Download the log and open it by using Fiddler to verify whether the Pre-Request Script worked or not.
