Identifying sensitive data
Invicti provides comprehensive protection against sensitive data exposure by scanning your application for any confidential information that you want to keep private.
Sensitive data is the information that you want to keep private. This information can include personally identifiable information, financial data, access credentials, or API keys. If such data leaks, it can lead to security concerns, such as identity theft, financial loss, business disruption, etc.
The sensitive data exposure is so problematic that the Open Worldwide Application Security Project (OWASP) also listed the exposure in its 2017 and 2021 Top Ten Report. OWASP cautioned that Sensitive Data Exposure has been the most common impactful attack.
How Invicti identifies sensitive data
Invicti employs advanced scanning techniques to detect sensitive data in the application’s responses. By examining the entropy value of the data, Invicti ensures that it has identified an actual secret rather than a random value.
Invicti can examine sensitive data in the following 5 groups: SaaS API keys, Server/database credentials, Customer/employee information, Data science scripts – SQL queries, and Hostnames/metadata.
To prevent noise and unnecessary reporting, Invicti sets a limit on the number of times it reports a secret that has already been detected. This ensures that only new instances of sensitive data are reported.
The Sensitive Data Exposure security check is enabled by default.
This topic explains how to enable or disable the Sensitive Data Exposure security check.
How to view the Sensitive Data security check in Invicti Enterprise
- Log in to Invicti Enterprise.
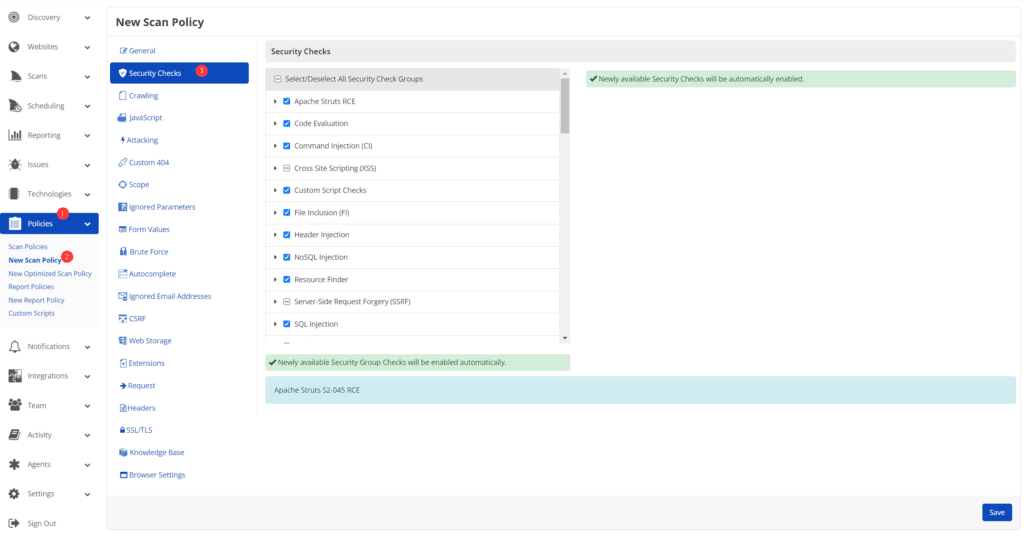
- From the main menu, go to Policies > New Scan Policies > Security Checks.

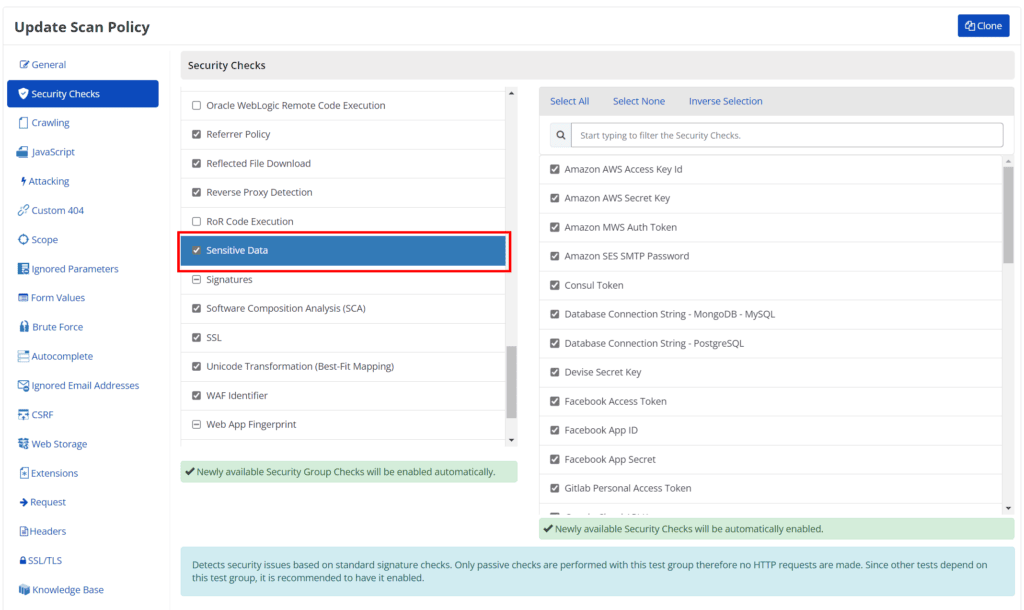
- Scroll down to the Sensitive Data.

- Select checks according to your needs.
- Select Save.
You can now use this scan policy while launching a new scan. For further information, see Creating a new scan.
How to view the Sensitive Data security check in Invicti Standard
- Open Invicti Standard
- From the ribbon, select Scan Policy Editor.
- From the Scan Policy Editor window, select the Security Checks tab.
- From the Security Checks Group list, select Sensitive Data.

- Select checks according to your needs.
- Select Apply, then OK to save the scan policy.