Configuring Predefined Web Form Values
What Are Web Forms?
Many web applications have forms which are used to capture user data. Forms are typically used in create a new account, newsletter sign-up, password reminder, shipping address details and other similar pages. They require the web application visitor to enter information such as a phone number, email address or credit card number.
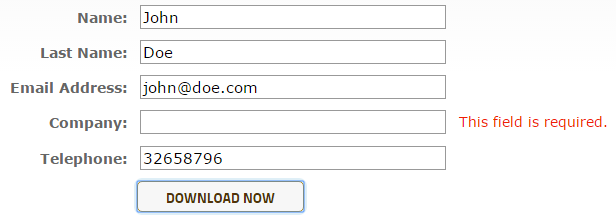
Many of these web forms typically have some basic checks because some of the fields might be mandatory. For example, if a user is required to enter his age, the form cannot be submitted if the user enters a non-numeric value such as the infamous asdf. This is an example of a web form, returning an error because the user did not populate the company input field, which is required.
Why Does the Invicti Scanner Need to Traverse Web Forms?
To scan a web application for vulnerabilities, the Invicti web security scanner needs to identify all its attack surfaces. This means that during the crawling stage, it has to discover all attack surfaces of the target web application. During this process, it needs to successfully submit the discovered forms and traverse them to access the pages that are typically only accessible once the form is submitted.
By default, Invicti is able to automatically populate and submit a form with pre-configured values. You can change these values or add new ones from the Form Values section in the Scan Policy, as explained in this article.
When Are the Configured Form Values Used?
These configured form values are used both during the crawling and attacking phases of the web security scan. If you would like to exclude a Form Value from being attacked, you can do so by excluding the Parameter from the scan.
Configuring Form Values in Invicti Web Application Security Scanner
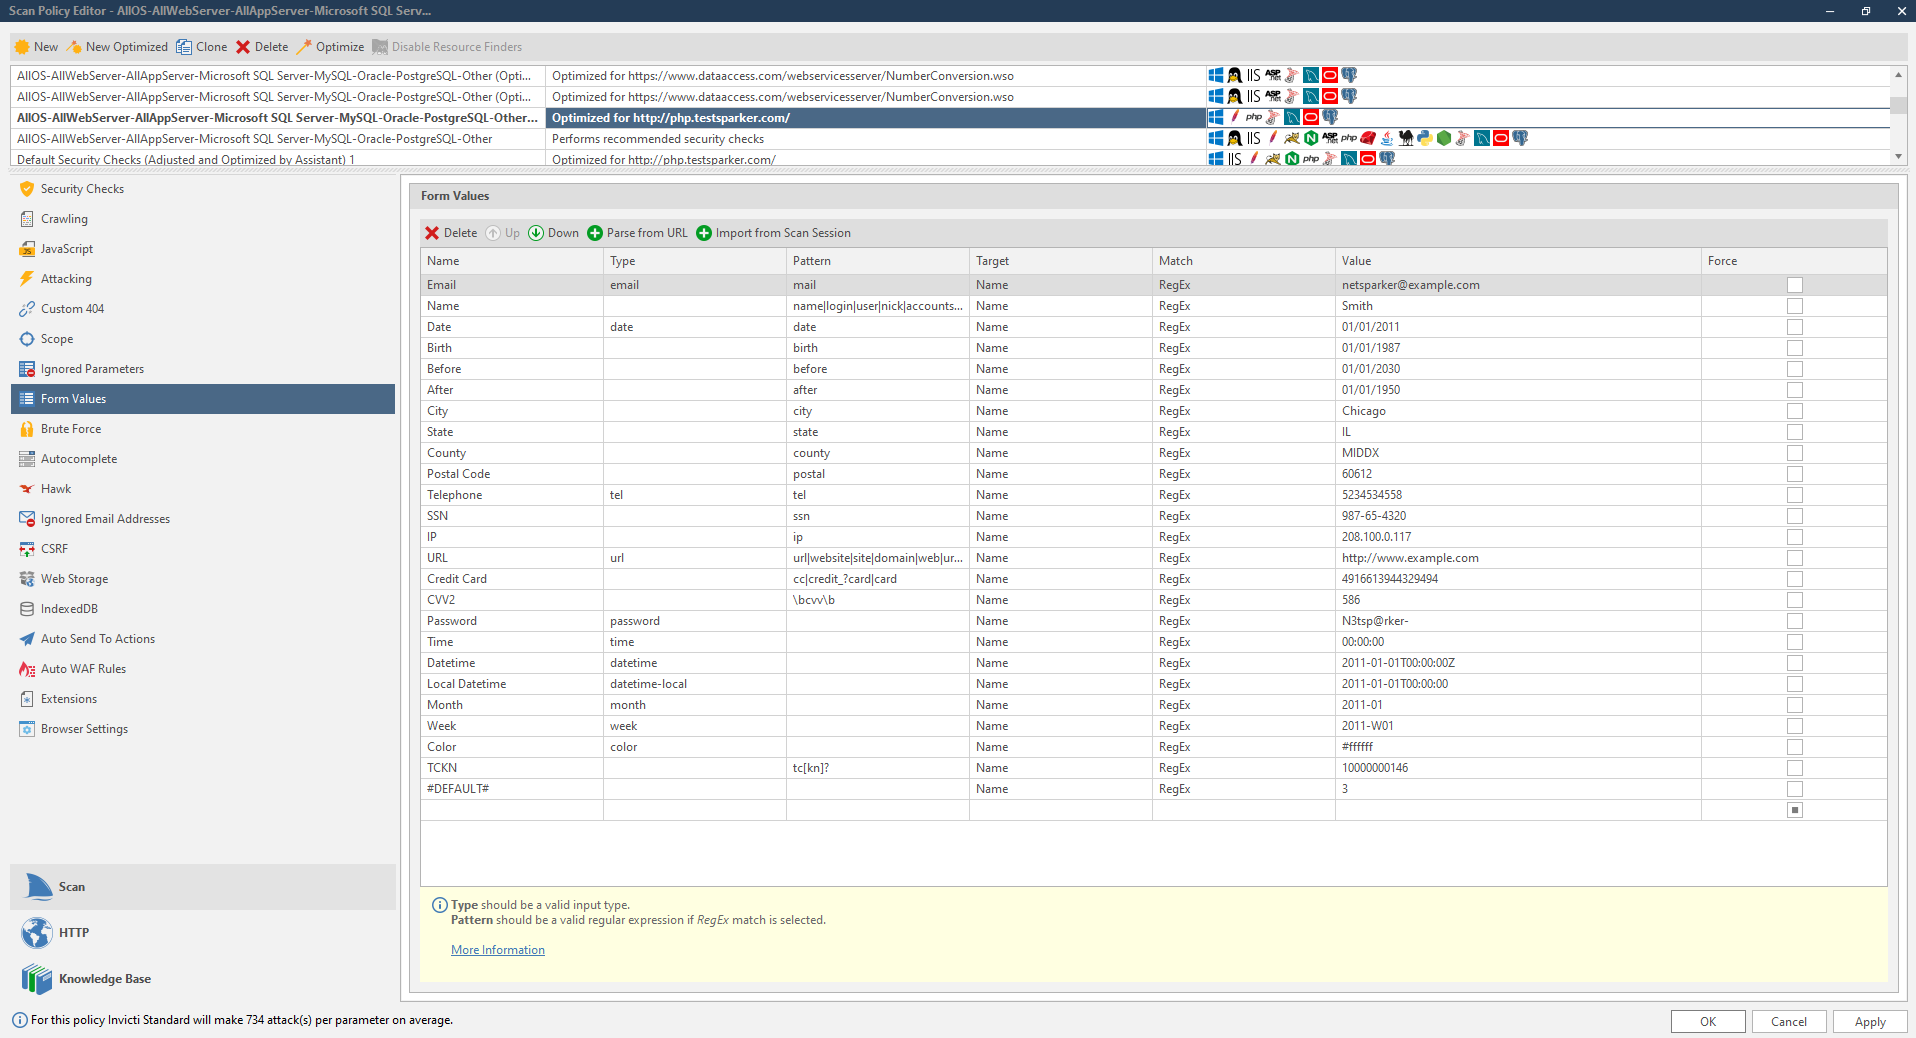
You can add a new pre-configured value or modify existing ones from the Forms Values setting in the Scan Policy. If you are using Invicti Standard, you can launch the Scan Policy Editor from the Start a new Website or Web Service Scan dialog or from the Tools drop down menu. In Invicti Enterprise you can access the Scan Policy Editor from the Policies node, by either creating a new scan policy, or edit an existing one.
The default set of preconfigured form values in both Invicti Standard and Invicti Enterprise online web application security scanner work in the majority of cases. However, should your web application require other data types, you can easily configure the scanners to automatically submit such data when crawling the web forms.

So if, for example, your web application expects a value that is unique to your business in a web form, such as Company Employee Number, you should configure this in the Form Values. Failing to do so, Invicti might fail to automatically traverse the web form and identify all possible attack surfaces on the web application.
The Default Match All Value
The entry #DEFAULT# is a special name. This entry is a catch-all entry, which means it is used when no other Value/Type is matched. You should not delete this entry. Should you wish to modify it, use a numeric only value, with which typically most checks are bypassed.
Option 1: Determine Which Input Parameters You Want to Add
First, you have to determine which input parameters you want to add. You can either do so manually or use the Parse from URL feature in Invicti, which extracts the list of parameters from a web form automatically.
How to Automatically Extract the List of Parameters from a Web Form in Invicti Standard
- Open Invicti Standard.
- From the Home tab, click Scan Policies.
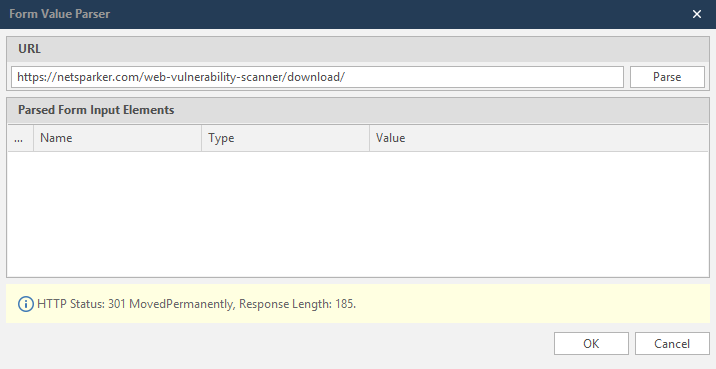
- Navigate to the Forms Values settings in the Scan Policy and click Parse from URL.
- Enter the URL of the web form in the URL placeholder.
- Click Parse.
- The scanner will automatically retrieve the list of Parameters, their type and value.
- Tick those you would like to add and click Save.
Once all the parameters are imported, you can also modify the parameters as explained in Option 3 of this procedure.
Option 2: Importing Form Values From the Scan Session File
You can use the Import from Invicti Scan Session feature in Invicti, which extracts the list of parameters from a previous scan session. This allows you to view any incorrect Form Value configurations and fix them.
How to Import Form Values in the Scan Session File in Invicti Standard
- Open Invicti Standard.
- From the Home tab, click Scan Policies.
In the Scan Policy Editor dialog (see Scan Policy Editor), navigate to the Form Values, and click Import from Scan Session.
 3. The Select Invicti Scan Session File to Import dialog is displayed.
4. Select the Invicti Session file, and click Open.
5. The scanner will automatically parse the list of parameters, including their Name, Type, Sent Value and Pages that contain the input.
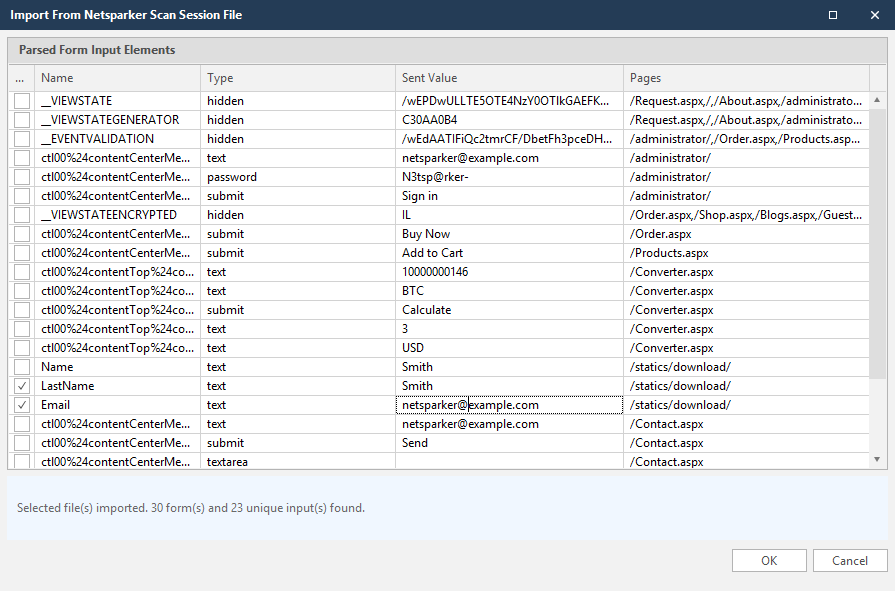
6. In the checkbox column, check those you would like to add, and click OK. The imported Form Values are displayed.
7. If required, you can adjust the value to use for subsequent scans by editing the Sent Value field.
8. Once all parameters are imported, you can also modify the parameters as explained in step 3 of this procedure.
Option 3: Find the HTTP Attributes Values of the Input Parameter
There are two options for how to find the HTTP Attributes values of input parameters. You can either retrieve them automatically using Invicti or find them manually. Both processes are explained below.
Add List of Web Form Parameters
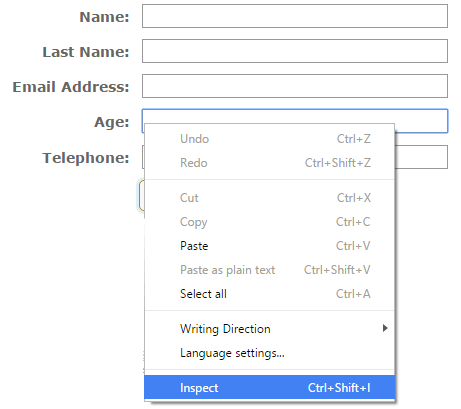
Before configuring a predefined form value, you need to know the value of the Name, or Placeholder or Label attributes of the input in question. For this example we will record the details of the Age input field in a form. Start by navigating to the web form and if you are using the Google Chrome browser right click the input field and select Inspect from the menu, as shown in the screenshot below.
In this case we can use the value of the name attribute which can be seen in the browser’s Developer Tools, as highlighted in the below screenshot. This parameter does not have a placeholder or a label attribute, but should the parameter in question have them you can record and use either of those values.
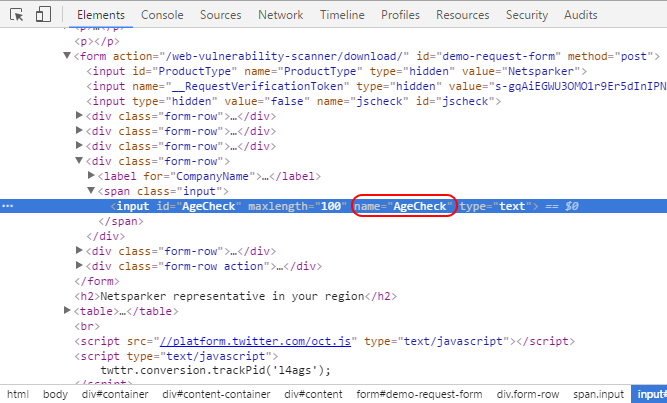
Alternatively you can also right click anywhere on the page and select View page source, to view the source of the page and manually search for the input ID.
Add the New Entry to Form Values in Invicti Scanners
For this example we will be configuring a form value of 20 for an input with ID AgeCheck. Therefore in the scanner we should configure the following:
Name: Age Check
Type: (Empty)
Pattern: AgeCheck
Target: Name
Match: Exact
Value: 20
Force: (Checked)
Below is a screenshot of the new form value configured in Invicti Enterprise.

Once the above is configured, whenever the Invicti scanner crawls a web form that has an input field with the name AgeCheck, it will submit 20 as a value. And by doing so it will successfully traverse the web form and crawl the pages which are only accessible once that form is submitted. Below is an explanation of what all the settings are.
Name: This is the friendly name, as a reference for you. It does not have any effect on the scan.
Type: This is the type of the input. If you leave this empty, the scanner will submit the value irrelevant of the input type. If you select a specific input type, Invicti will submit the value to the form if either the Type OR Pattern match.
You can also select the Type and not specify any pattern so the scanner populates all the inputs which match the selected Type with the provided value. For example by default the Invicti scanners have the following input configured:
Name: color
Type: color
Pattern: (empty)
Target: Name
Match: Regex
Value: var(–color-customcolors-2)
In such case the Invicti scanner will always submit the value of var(–color-customcolors-2) whenever it identifies an input of Type color.
Match: This is the match type for the Pattern field and it has five options:
- RegEx: Use regular expression to match the pattern. For example the regular expression [\w\d]*cc|credit_?card|card[\w\d]* will match all the input fields that have any of the following values in the configured HTML attribute value; cc, credit_card, card
This is the most flexible option if you are familiar with RegEx. You can use a tool such as RegEx101 to test your RegExes.
- Exact: The pattern value should be the exact match to the configured HTML attribute value. Therefore if the name is AgeCheck, the pattern should be AgeCheck, else it won’t match.
- Contains: The specified pattern should be part of the configured HTML attribute value. Example; if the Name attribute is AgeCheck, the pattern can be Age or Check.
- Starts: The HTML attribute value should start with the specified pattern. Example; if the value of the name HTML attribute is AgeCheck, the pattern can be Age, A or Ag. Check won’t match.
- Ends: The HTML attribute value should end with the entered pattern. Example; if the valuie of the HTML attribute is AgeCheck, the pattern can be Check or eck. Age won’t match.
Pattern: This is the value that the HTML attribute value will be matched against based on the selected Match (RegEx, Exact, Contains, Starts, Ends). Use the URL encoded name if the attribute value contains non-ASCII characters.
Value: This is the value Invicti will submit to the input parameter when the match is successful.
Force: When this option is enabled Invicti will submit the provided value even when the parameter is already populated with some other value. Therefore if for example Invicti crawls a form which has a default value of 10, it won’t try to overwrite it by default. Though if the Force option is checked, and Type and Pattern match, Invicti will submit the provided Value instead of 10.
Form Values for POST and GET Parameters
By default, the Form Values settings only work for POST parameters. If you want to apply the same rules to GET parameters, you can set OnlyFillUpPost to True in Advanced Settings.

When this option is set to False, just like with POST parameters the Invicti scanner will populate GET parameters by using the same rules as well.
A form on a page with an input doesn’t always mean POST. Check the method attribute of the <form> tag to see whether it’s a POST or GET. If form element does not have method attribute, browsers fallbacks to GET for the form element.