Configuring OAuth2 Authentication
Invicti supports the OAuth2 Authentication mechanism, enabling you to configure scans for websites that require OAuth2 authentication.
The OAuth2 authentication mechanism in Invicti Enterprise and Invicti Standard supports all grant types that are defined in RFC-6749. In addition, Invicti has a Custom flow that is used for token based authentication, except OAuth2 flows.
OAuth2 Authentication Fields
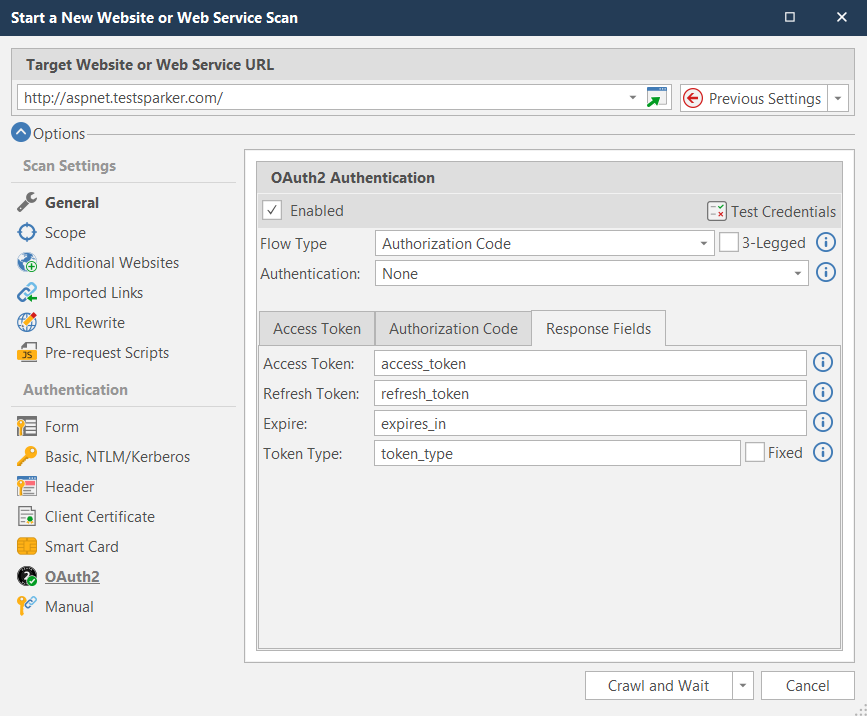
This table lists and explains the fields in the OAuth2 Authentication section.
|
Field |
Description |
|
Enabled |
Select to enable OAuth2 authentication. Once enabled, the Flow Type field is activated. |
|
Flow Type |
OAuth2 Flow type is defined in RFC-6749. From this dropdown, select one. There are five types: Once an option has been selected, the other fields are activated. |
|
3-Legged |
Select to enable 3-Legged OAuth authentication. |
|
Authentication |
Select the authentication type required by the OAuth2 endpoint(s). The options from the dropdown are:
|
|
Access Token |
In this tab, you can configure the parameters required to make a request to the Access Token endpoint to retrieve the OAuth2 access token. |
|
Authorization Code |
In this tab, you can configure the parameters required to make a request to the Authorization Code endpoint to retrieve the Authorization Code. This tab is visible only when the Flow Type selected is Authorization Code. |
|
Response Fields |
In this tab, you can set the following options:
|
|
3-Legged Auth |
Complete if the the 3-Legged checkbox above is enabled :
OAuth2 flows that require 3-Legged authentication such as filling username/password fields, or interacting by clicking an ‘Allow’ button, are now fully supported. If a form requires a username and password, you can provide credentials using the 3-Legged Authentication section. |
|
Endpoint |
Click to open OAuth2 Access Token Endpoint dialog and complete fields:
Endpoint(s) and associated parameters must be configured. Invicti automatically lists the default parameter names and values defined in the RFC-6749. Because these parameter names and values may vary between implementations, Invicti allows you to add, remove and edit them. |
|
Name |
Enter the name of the request parameter. |
|
Value |
Enter the value of the request parameter. |
|
+ New |
Select to add a custom field. There are two options: Default and Encrypted. You can add the key and value pair. If you select Default, the key and value appear in plain text. Select Encrypted if you want to add sensitive information, such as passwords. If selected, the value appears as *** in the scan profile while the sensitive information appears as blank in the API response. |
|
Encoded |
Select if you want Invicti to encode your input again. |
|
Test OAuth2 Credentials |
Click to test the configured settings. |
How to Configure OAuth2 Authentication in Invicti Enterprise
- Log in to Invicti Enterprise.
- From the main menu, click Scans, then New Scan. The New Scan window is displayed.
- From the Authentication tab, select OAuth2. The OAuth2 section is displayed.
- Select the Enabled checkbox.
- From the Flow Type drop-down, select an option.

- Click the Endpoint field. The OAuth2 Authorization Code is displayed.
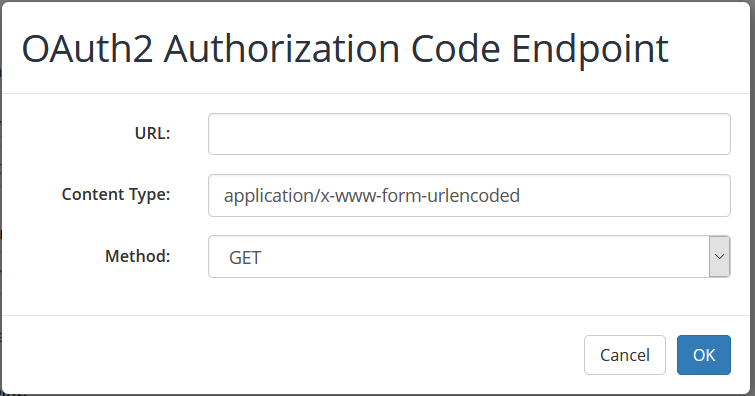
- Enter the endpoint URL and click OK.
- If the Authorization Code has been selected as the Flow Type above, an additional panel will be displayed to set its endpoint values. The Authorization Code will be automatically requested from its endpoint and redirected to the Access Token endpoint. The name of the code field that will be sent to the Access Token endpoint can be edited, though its value cannot (it is a dynamic value that is automatically populated by Invicti).
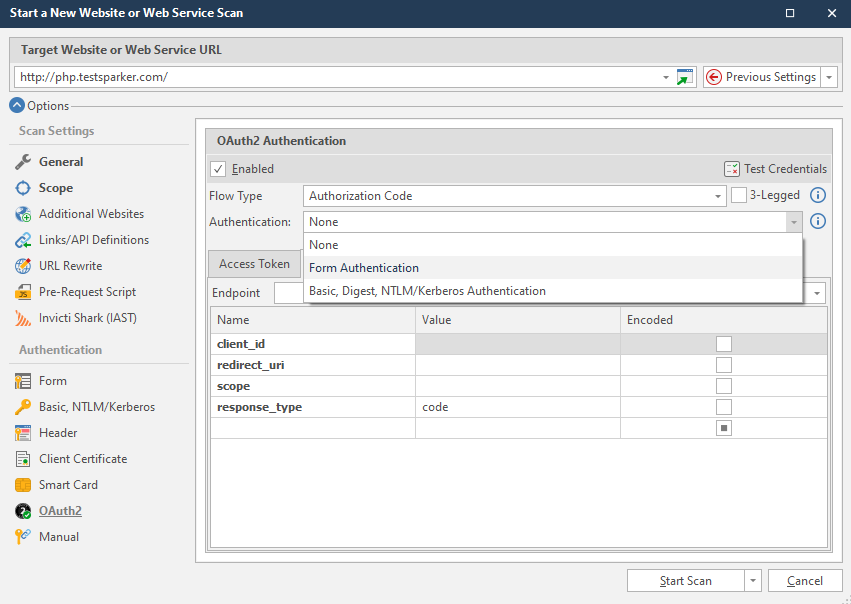
- If OAuth2 endpoints require additional authentication, such as Form or Basic, Digest, NTLM/Kerberos authentication, you must configure them from the Authentication dropdown (see Configuring Form Authentication in Invicti Standard and Configuring Basic, Digest, NTLM/Kerberos and Negotiate Authentication).
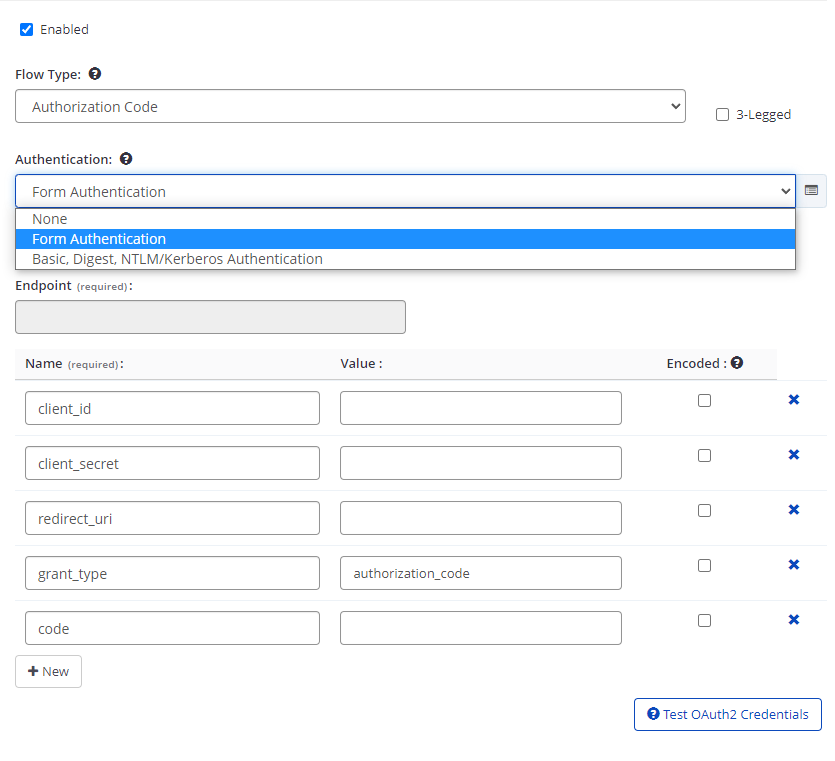
- Click the Response Fields tab. These fields are already populated with the default values defined in RFC-6749.
- Click Test OAuth2 Credentials to make sure that it works correctly.
How to Configure OAuth2 Authentication in Invicti Standard
- Open Invicti Standard.
- From the Home tab, click New. The Start a New Website or Web Service Scan dialog is displayed.
- Click the OAuth2 tab.
- Select the Enabled checkbox.
- From the Flow Type drop-down, select an option.

- In the Endpoint field, enter the endpoint URL.
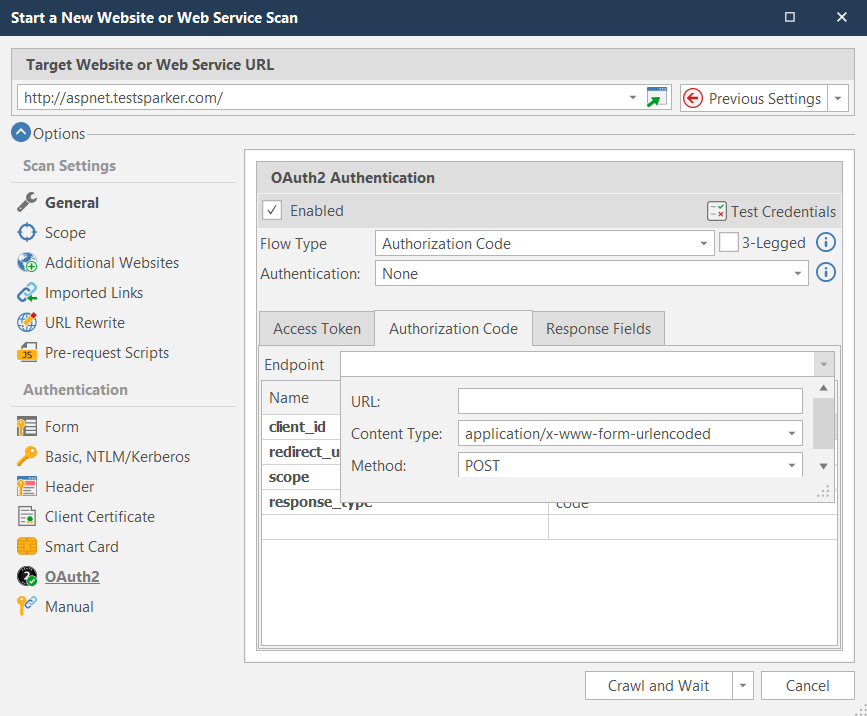
- If the Authorization Code has been selected as the Flow Type above, an additional panel will be displayed to set its endpoint values. The Authorization Code will be automatically requested from its endpoint and redirected to the Access Token endpoint. The name of the code field that will be sent to the Access Token endpoint can be edited, though its value cannot (it is a dynamic value that is automatically populated by Invicti).
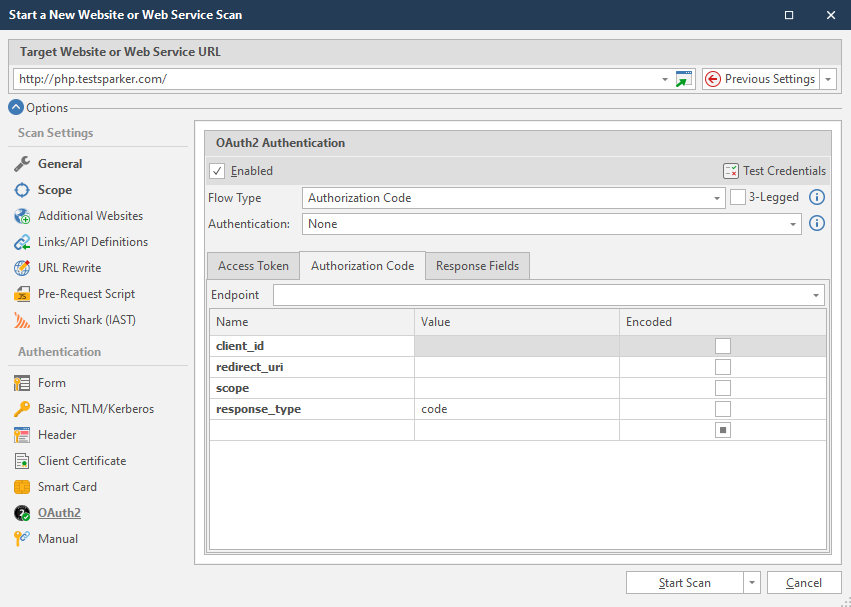
- If OAuth2 endpoints requires an additional authentication, such as Form or Basic, Digest, NTLM/Kerberos authentication, you must configure them from the Authentication dropdown (see Configuring Form Authentication in Invicti Standard and Configuring Basic, Digest, NTLM/Kerberos Authentication in InvictiStandard).
Interactions, such as clicking buttons, can be achieved with custom scripting support.
For further information on custom scripting, see Custom Scripts for Form Authentication in Invicti Standard.
- Click the Response Fields tab. These fields are already populated with the default values defined in RFC-6749.
